Download, install, and register the Tuya Smart app.
Make sure that you have an account of Tuya IoT Console and have completed the enterprise real-name authentication.
This topic aims to help developers quickly understand the use process of the Tuya Cloud Development Platform, and immediately open the smart world of the Internet of Everything.
Cloud Development Platform is a set of technical services for Tuya developers. By opening the cloud OpenAPI and device SDK, Cloud Development Platform provides developers with better additional services of hardware devices. An IoT platform with its own characteristics can be developed. At the same time, SaaS developers can also use Tuya’s rich IoT hardware ecosystem to develop a competitive industry SaaS.
Download, install, and register the Tuya Smart app.
Make sure that you have an account of Tuya IoT Console and have completed the enterprise real-name authentication.
It only takes five steps to use the Tuya Cloud Development Platform. The operation process is as follows.
Log in to Tuya IoT Console.
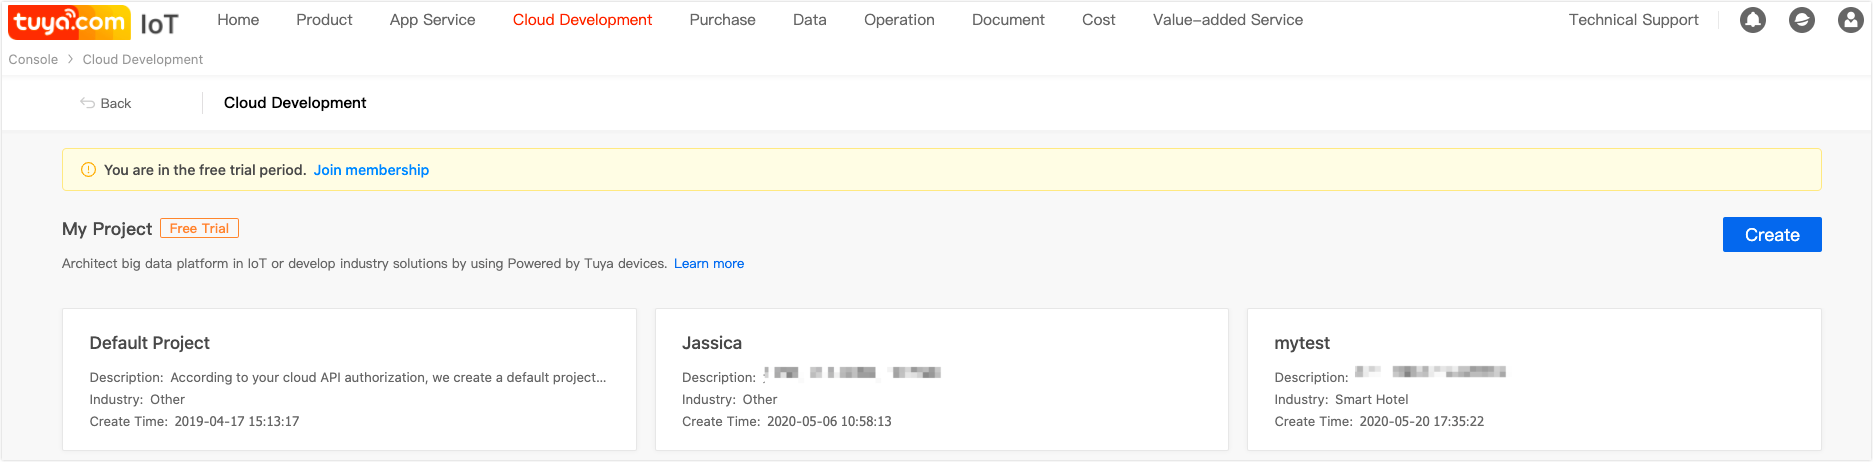
Click Cloud Development in the top navigation bar.
On the Cloud Development page, click Create.
On the Create Project page, configure the project name, description, and industry.
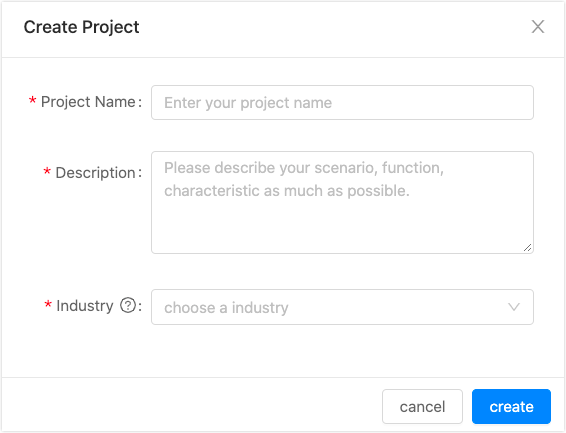
Click Create to complete project creation.
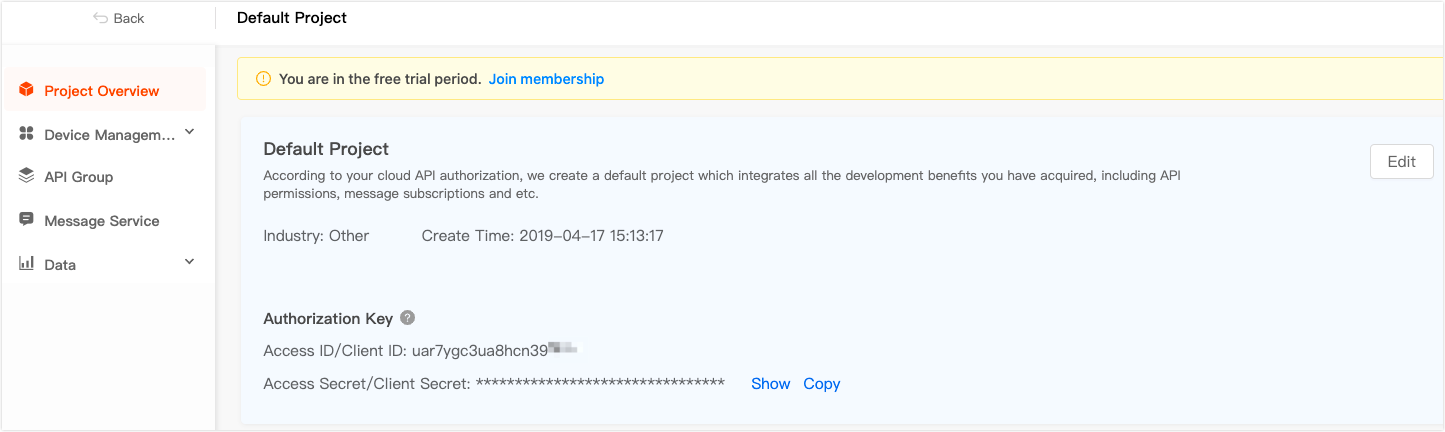
Note: After a project is created, you can view the Authorization Key of the project. The key is the authorization credential to request OpenAPI. Keep it properly.
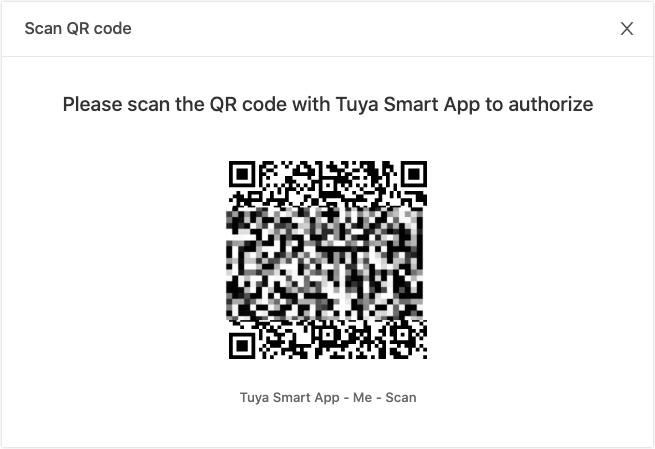
With Tuya Smart app, scan the QR code and link the devices to your project.
On the Cloud Development > Default Project > Device Management > Linked Device page, click Link devices by App account.
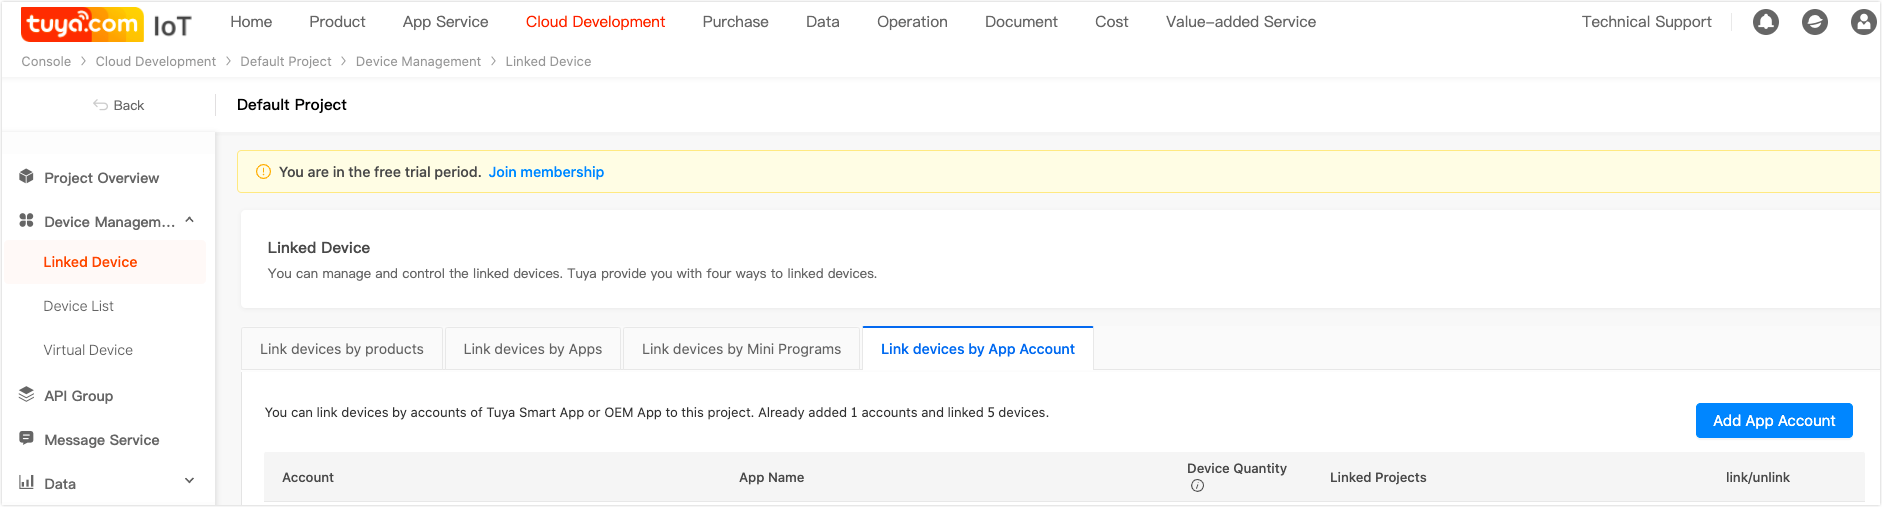
On the Link devices by App account page, click Add App Account.
A QR code pops up. You can scan the QR code with Tuya Smart app or OEM app to get the authorization.
You can apply for OpenAPI permission and subscribe to messages on Cloud Development Platform of Tuya IoT Console.
Apply for API permissions
On the API Group page, you can apply for API group permissions.
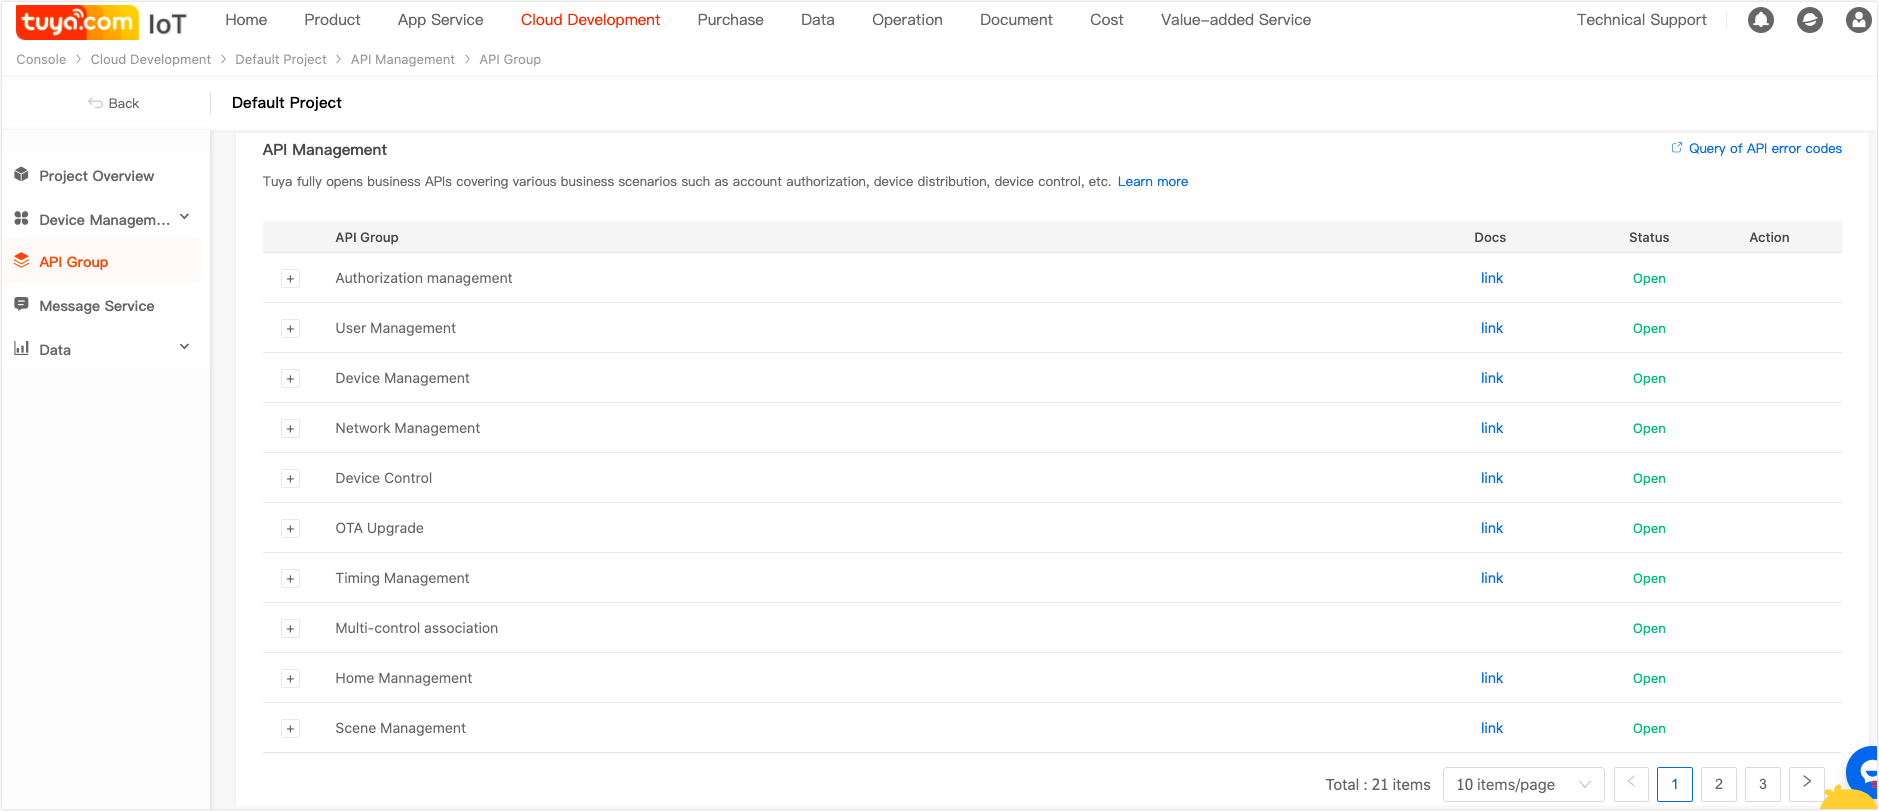
Note: At present, all API groups of Tuya Cloud Development Platform are opened by default. Subsequent high-level API groups can be activated separately according to your application.
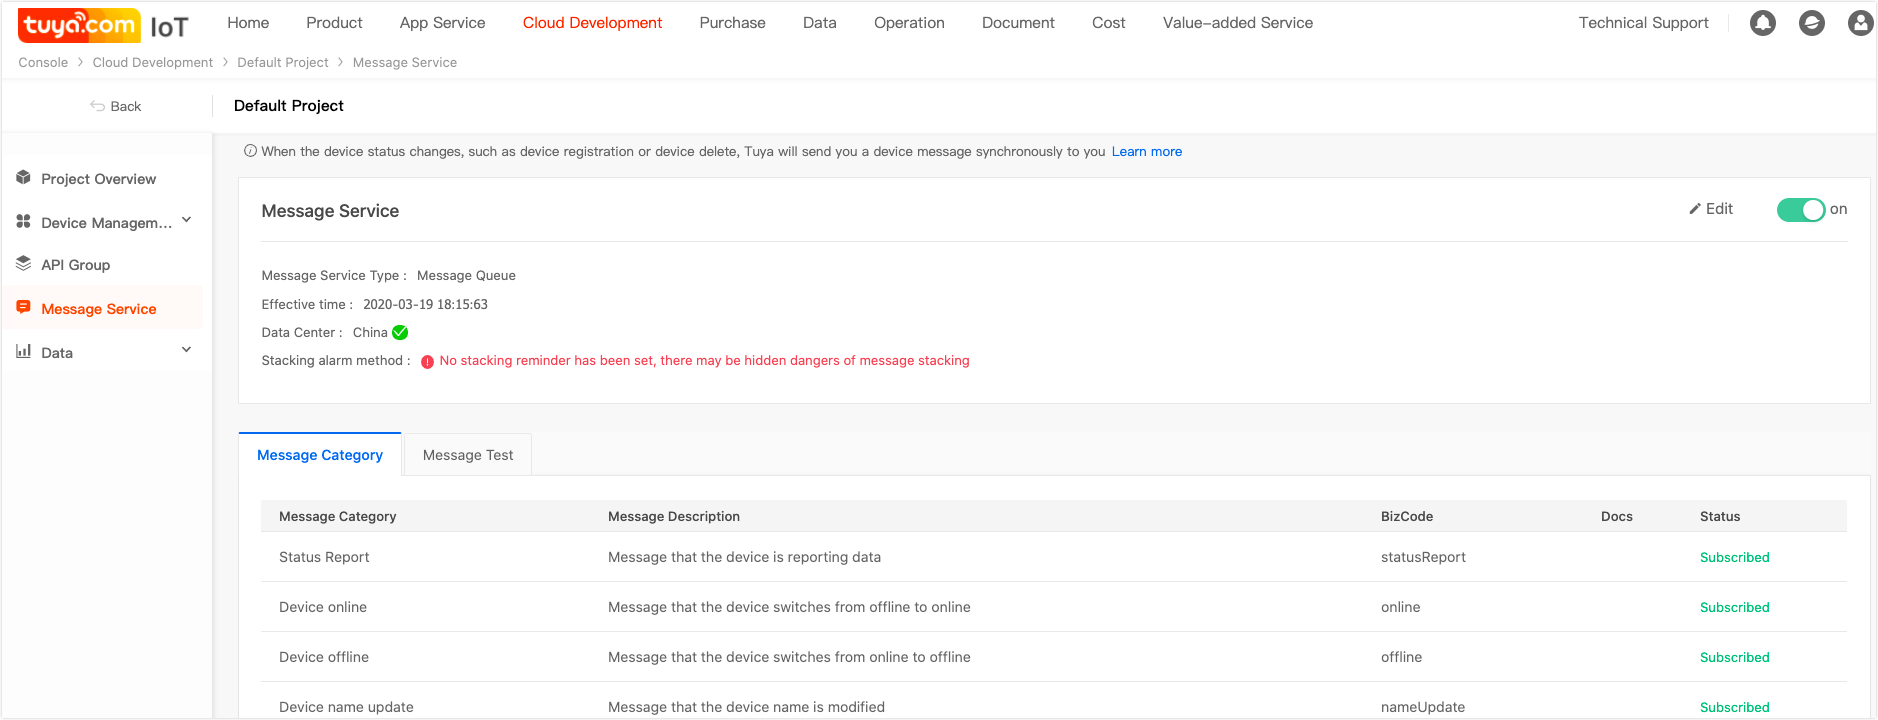
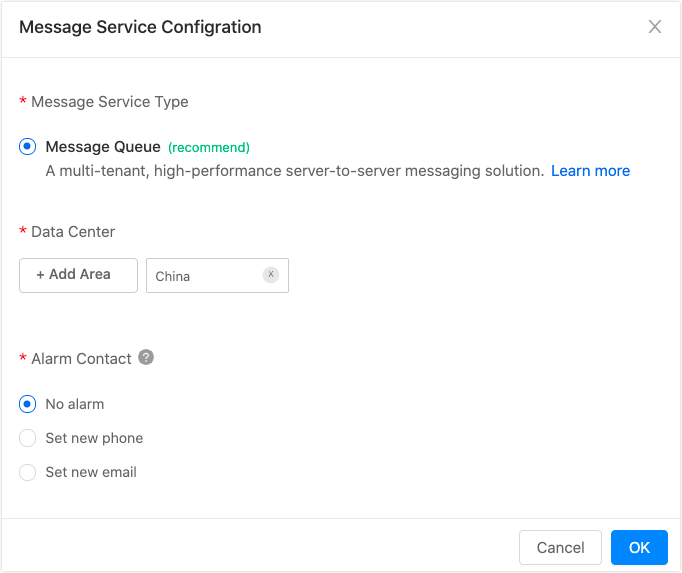
Activate message service
You can click to activate the message service in the Message Service module.
The app created through the Tuya IoT Console has built-in Tuya SDK, which can interact with the Tuya IoT Console and control the devices. This topic uses Postman as an example to show you how to simulate the device control by calling OpenAPI.
Postman is a powerful Chrome plug-in for web page debugging and sending web page HTTP requests. The environment configuration steps related to Postman and Tuya Cloud are as follows.
Click to Download Postman.
Note: It is recommended to download
7.12.0and above version.
Import the Tuya Cloud API interface package.

Import the Tuya Cloud API environment package.
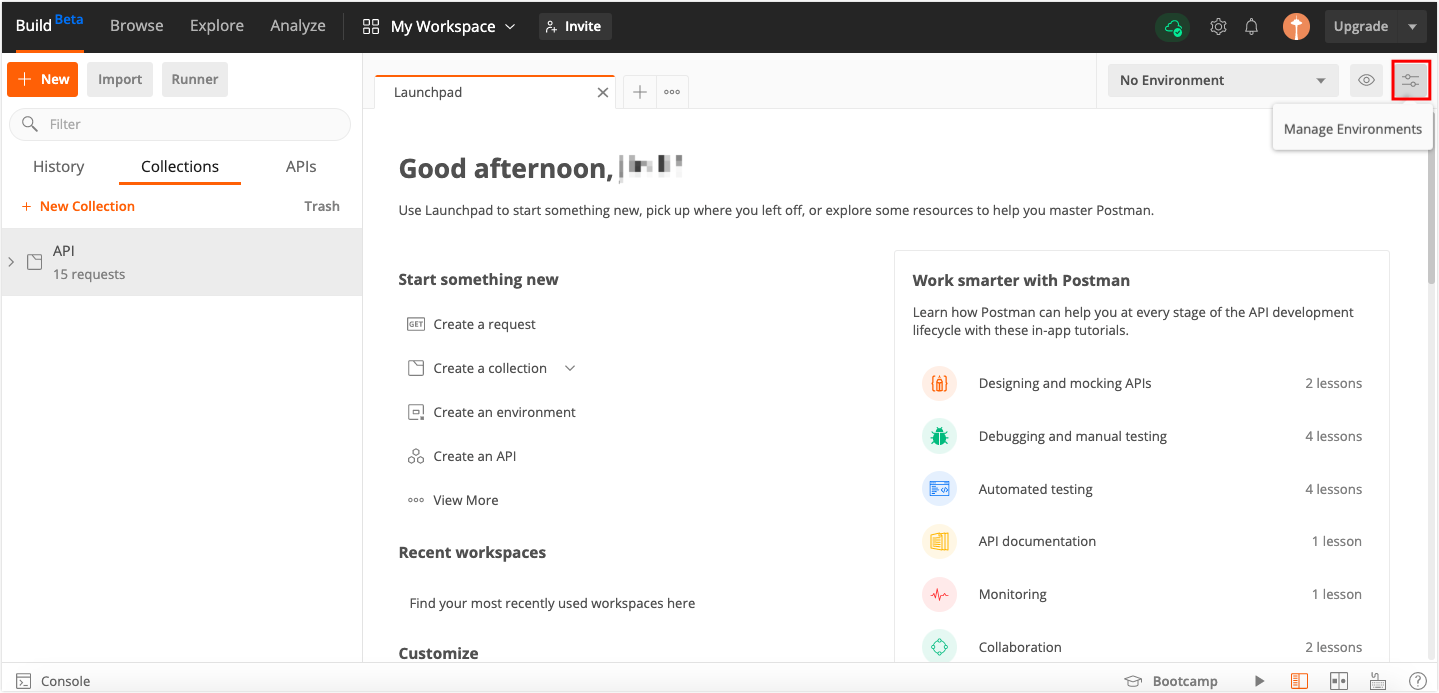
Set environment variables.

| Parameter name | Description |
|---|---|
| url | Tuya cloud service, such as https://openapi.tuyacn.com in China. |
| client_id | The username. It is equivalent to the accessId in the developer platform. |
| secret | The password. It is equivalent to the accessKey in the developer platform. |
| device_id | Device ID. You can view the information corresponding to the device in the app. |
| schema | The channel identifier of the app. Set it according to the app package name. For example, if your app package name is com.aa.bb, then your schema value is aabb. |
Note: Click the device you added in the app, and click the pencil icon in the top right corner to view the device ID in the Device information section.
OpenAPI settings
Request method OpenAPI supports the following four request methods.
Note: When the request method is POST, the Content-Type must use
application/json.
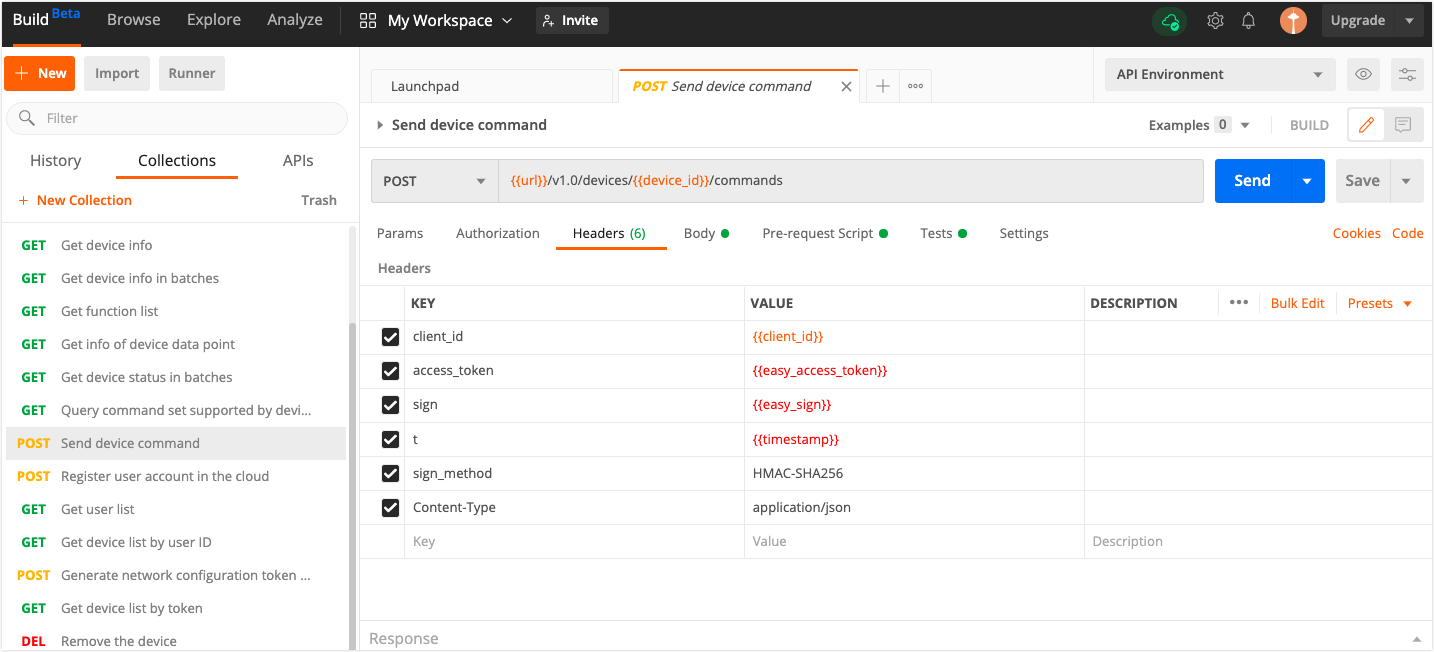
Request header settings
Any interface must add the following parameters to the request header.
| Parameter name | Type | Parameter location | Description | Required |
|---|---|---|---|---|
| client_id | String | header | client_id | Yes |
| sign | String | header | Signature calculated by using the specified signature algorithm: token-related interfaces and business-related interfaces | Yes |
| sign_method | String | header | Signature digest algorithm, HMAC-SHA256 | Yes |
| t | Long | header | 13-digit standard timestamp | Yes |
| lang | String | header | Language. Default language is en |
No |
Signature method: Tuya Cloud currently provides two signature algorithms according to different application scenes.
Token related interface: (v1.0/token&v1.0/token/{refresh_token}): sign = HMAC-SHA256(client_id + t, secret).toUpperCase()
Business interface (non-token interface): sign = HMAC-SHA256(client_id + access_token + t, secret).toUpperCase()
Take the Wi-Fi socket as an example to show you how to use Postman to control the device. For detailed operation steps, see Wi-Fi paring practice.
Get token
Get the token through AccessID, and then use this token to request other APIs. Otherwise, there will be permission problems.
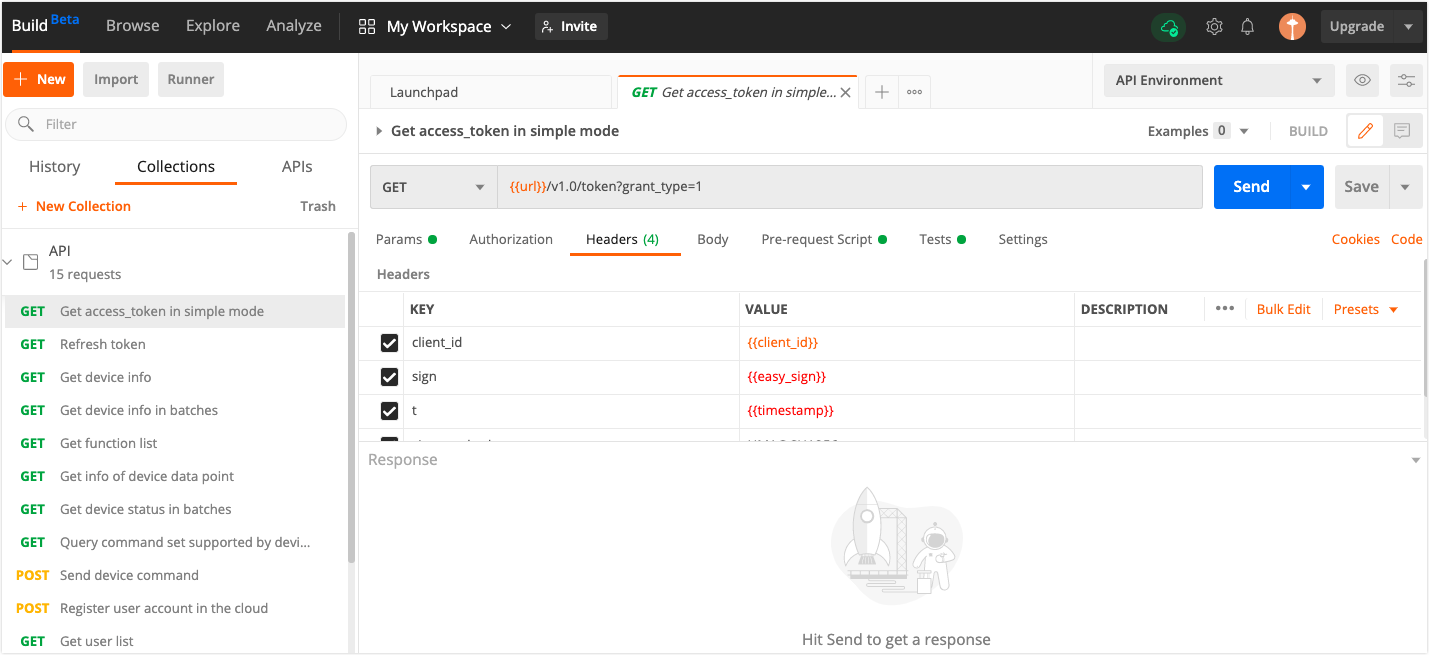
Note:
grant_type=1means to use simple mode authorization.
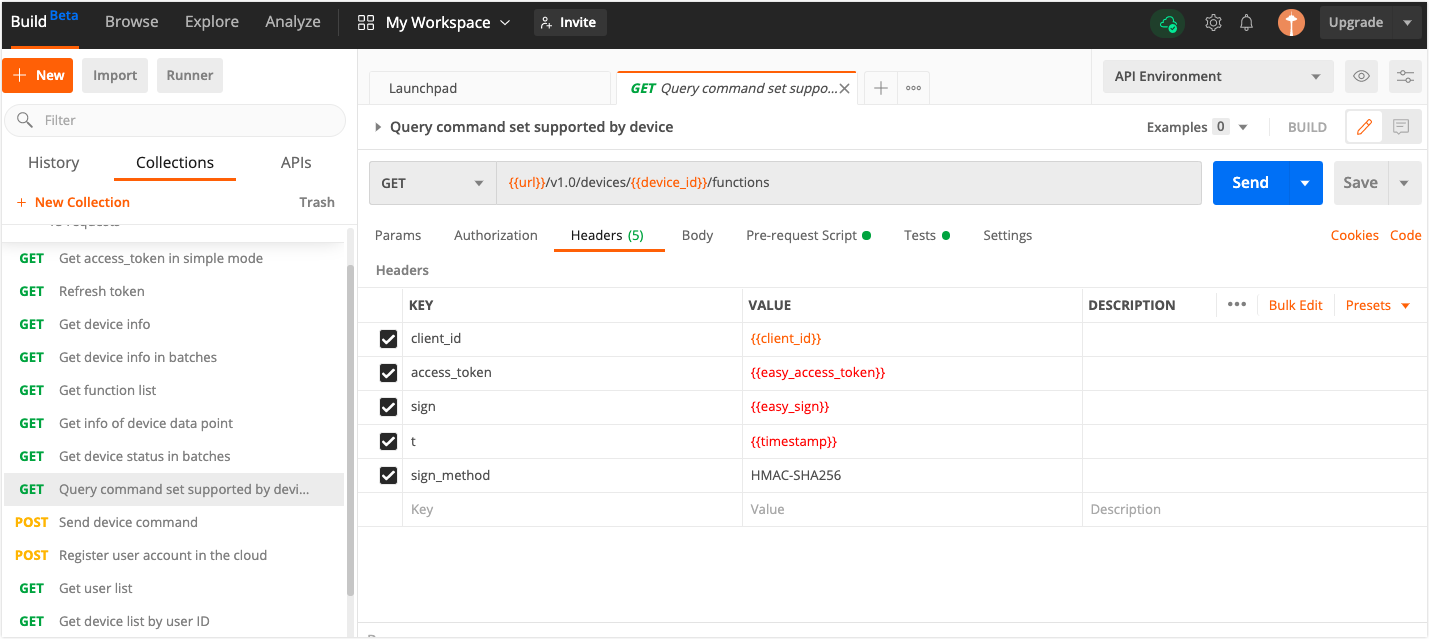
Query command set supported by device
Get the commands supported by the device. Then, you can control the devices according to the result.
Control the device
According to the commands supported by the device, different effects can be achieved during device control.
Note: See the developer documentation for the usage of other interfaces.
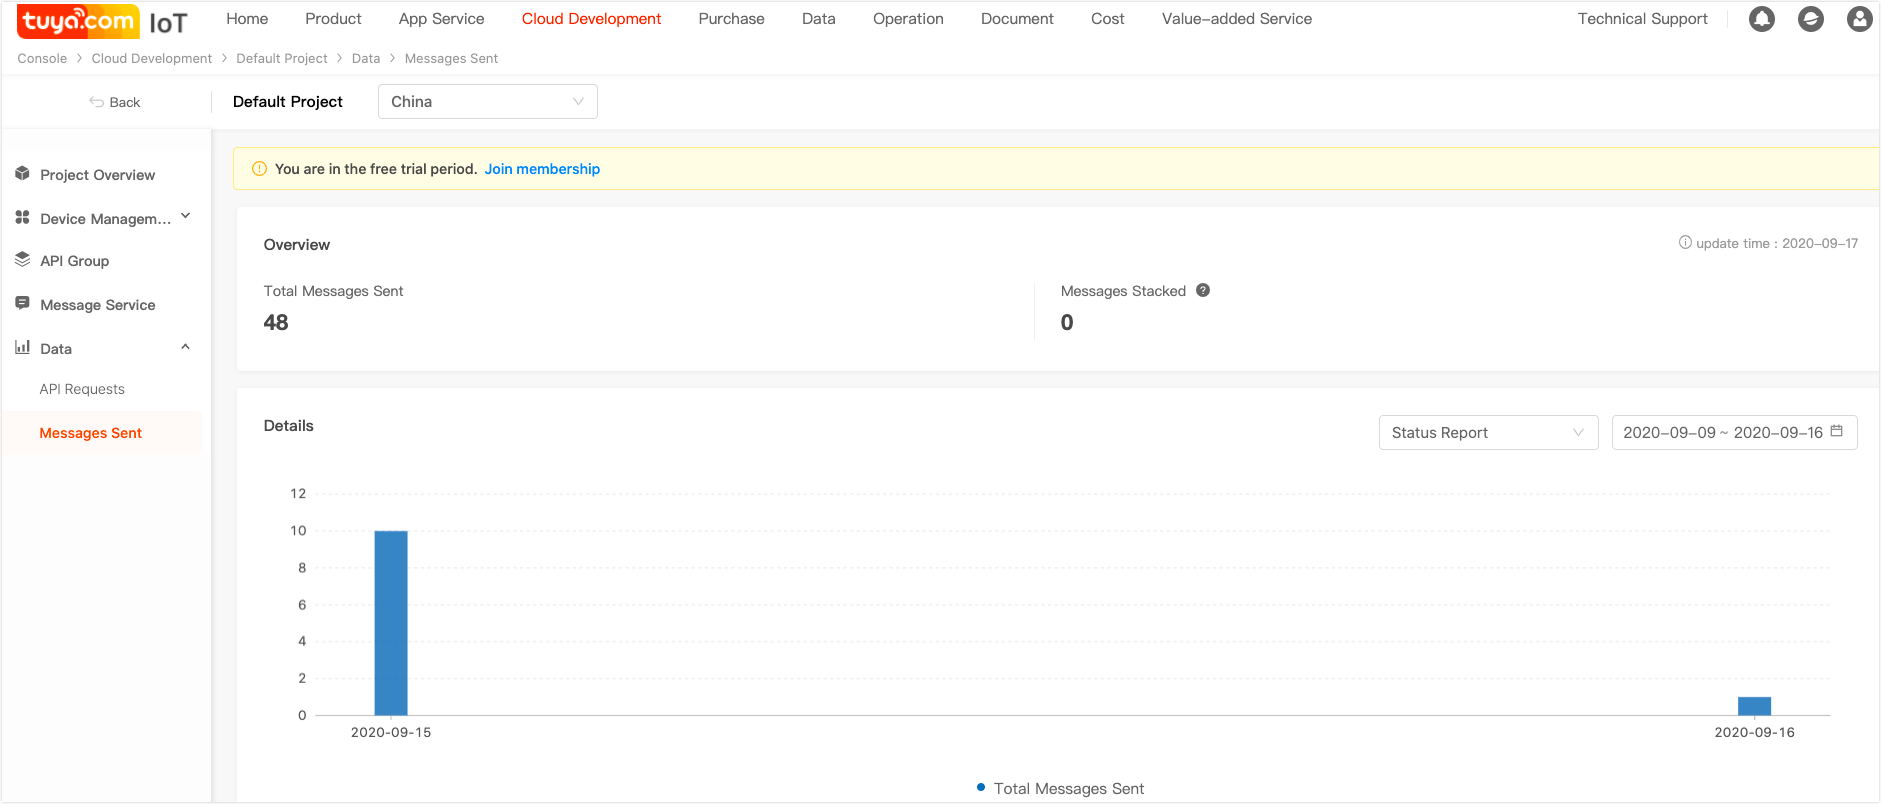
You can view your data statistics in Tuya IoT Console > Cloud Development. Tuya provides a statistical display of two data dimensions.
Statistics of API requests

Statistics of messages sent
Q: How long is the validity period of the token?
Tuya: The validity period of the token is two hours. You must apply again after the token expires.
Q: What are clientId and secret, and how can I get them?
Tuya: clientId is the AccessId, and the secret is the AccessKey in the Cloud Development Platform.
Q: What is the schema and how can I get it?
Tuya: schema is the channel identifier of the app. You can get it according to the app package name. For example, if your app package name is com.aa.bb, then your schema value is aabb.
Q: What are the data operation permissions in the application scene?
Tuya: In the application scene, the developer has permission to operate the devices in the app.
Q: Why does the platform prompt “permission deny” when getting access to the interface?
Tuya:
Through the above simple tutorial, you have a general picture of the capabilities provided by Tuya Cloud OpenAPI. Then, you can code to implement Tuya Cloud API and carry out corresponding business development.
For more interfaces, see the API list. If you have more customization requirements, contact Tuya business personnel.
If you still have questions about the interface calling, you can submit a ticket to ask technical questions and provide interface request parameters.